
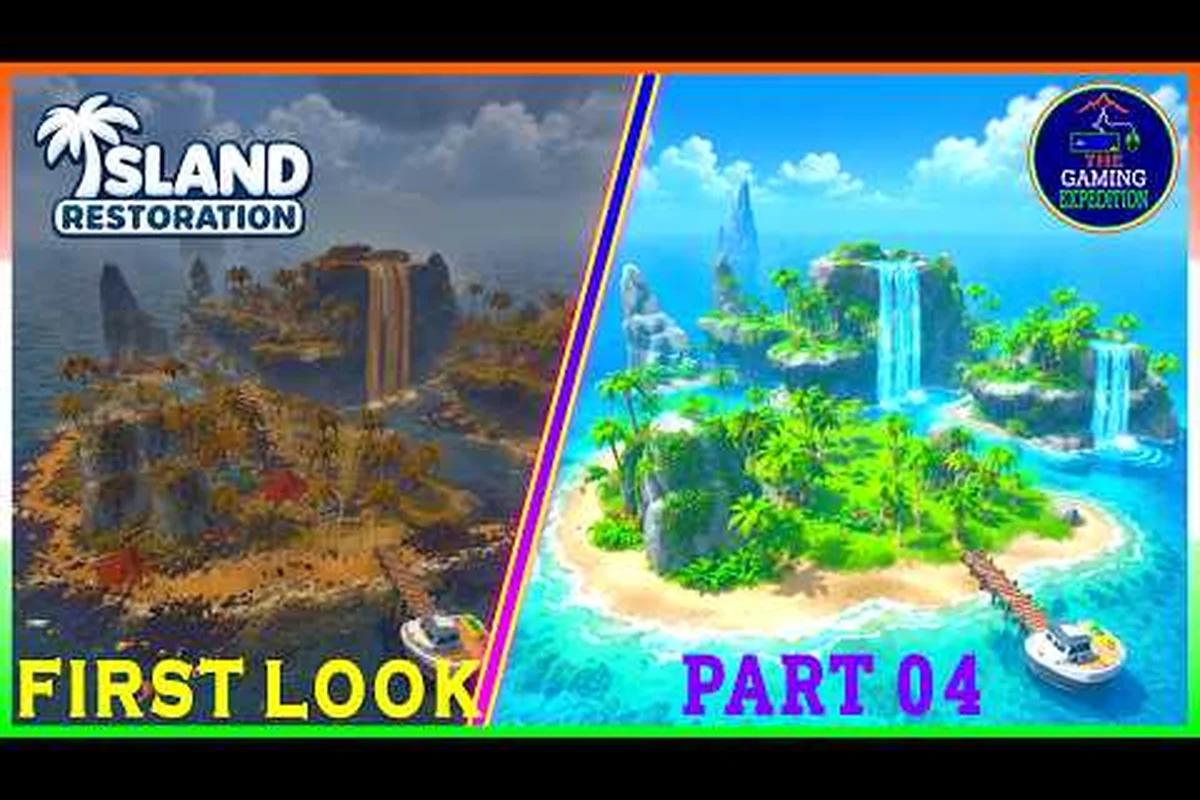
Every polluted shoreline you scrub clean in Island Restoration tells a quiet story: oil slicks peel back to reveal turquoise water, tangled vines retreat from sunlit clearings, and rescued animals wander back into habitats that remember them. The full loop of decay and rebirth — what the community calls the island transformation — sits at the heart of this cozy cleaning sim from solo developer EliteTheDev, and understanding that loop is the difference between a relaxing sail and a frustrating grind.
What follows is a complete walkthrough of how a wrecked map turns into a thriving biome across the game's 4 biomes and 12 maps. You will learn the exact triggers that flip a polluted island back to its natural state, the six tools and skill-tree upgrades that accelerate the work, and the milestone-based progression that keeps each session feeling rewarding. Whether you are playing the demo on the Tropical Isles or planning your launch-week run on September 23, 2026, this island restoration nature return guide gives you the roadmap to every restoration milestone.
How Island Transformation Works in Island Restoration
Before chasing efficiency, you need a mental model of the transformation loop. The game is built around a single core cycle: sail to a damaged map, clean every pollution node using the right tool, watch the environment react, and unlock the next island in the chain. Each successful cleanup shifts the island closer to a "restored" state, which is the moment nature, animals, and bonus rewards fully return.
The Core Pollution-to-Paradise Loop
According to the official Steam page for Island Restoration, every map starts in a polluted state with four pollution types layered on top of each other: oil spills, garbage, vines, and mud. Each type responds to a specific tool, and removing one type often exposes another underneath. This layered design is what creates the satisfying "peeling back the mess" feeling, because a single spray of the pressure washer on an oil spill can reveal a hidden patch of garbage you have to bag by hand.
The pollution-to-paradise loop in Island Restoration is a tightly designed four-step cycle that repeats on every target island: navigate, assess, cleanse, and trigger. Each iteration resets the transformation meter to zero, so mastery comes from chaining loops efficiently across the world map while keeping your tool loadout optimized for whatever pollution mix the next island hides under oil, garbage, vines, or mud.
-
Sail to the next target island from the world map.
-
Survey the map to identify which pollution types are present and which tools are most efficient.
-
Clean every node until the pollution counter on the HUD hits zero.
-
Trigger the nature return sequence by completing a final objective — usually rescuing an animal or restoring a landmark.
Once that fourth step fires, the visual transformation is immediate. Music shifts, color grading warms up, vegetation re-spawns, and animals that were hiding in polluted zones walk back into view. The island is now considered "transformed" and contributes to your overall progression toward 100% completion.
The Four Pollution Types and Their Counter-Tools
Understanding which tool handles which pollution is non-negotiable for fast runs. The game ships with six cleaning tools, but the first four cover the entire base pollution set. Pairing the right tool to the right mess is the single biggest speed lever you control.
| Pollution Type | Primary Tool | Common Locations | Removal Speed |
|---|---|---|---|
| Oil Spill | Pressure Washer | Rocky shores, dock areas | Fast |
| Garbage | Trash Grabber | Beaches, paths, around buildings | Medium |
| Vines | Pruning Shears | Forest edges, ruins, cliffs | Slow |
| Mud | Scrub Brush | Marshes, riverbeds, low ground | Medium |
A useful rule of thumb, confirmed by community testing on the demo branch: always clear vines last, because they often drape over garbage piles and oil slicks. Stripping the vines first means you re-walk the same ground three times instead of once.
Tools, Upgrades, and the Skill Tree That Power Restoration
Your raw tool roster is only the starting point. The island restoration unlock guide really begins at the skill tree, because early upgrades compound across every map you ever play. EliteTheDev's skill tree preview shipped with the 4,000-wishlist demo update, and players who tested it reported immediate efficiency gains on later Tropical Isles maps.
The Six Cleaning Tools Explained
The base game launches with six unlockable cleaning tools, each tied to a specific pollution niche rather than a generic all-purpose role. Two of the six (the Pressure Washer and Trash Grabber) are available from the first island, giving new restoration players a fully functional loadout before the first transformation milestone. The remaining four unlock as you progress: Island 2 adds the Scrub Brush for sticky residues, Island 3 the Pruning Shears for biological overgrowth, Island 4 the Suction Hose for heavy sludge, and Island 5 the Sand Blaster for mineral deposits — meaning tool acquisition itself tracks the island restoration progression curve.
| Tool | Unlocked At | Best For | Upgrade Priority |
|---|---|---|---|
| Pressure Washer | Island 1 (free) | Oil spills, hard surfaces | High |
| Trash Grabber | Island 1 (free) | Garbage, small debris | High |
| Scrub Brush | Island 2 | Mud, sticky patches | Medium |
| Pruning Shears | Island 3 | Vines, overgrown roots | Medium |
| Suction Hose | Island 4 | Heavy sludge, deep mud | High (late game) |
| Sand Blaster | Island 5 | Stubborn stains, mineral buildup | High (late game) |
Early-game players should dump their first skill points into Pressure Washer range and Trash Grabber capacity, since both upgrades directly cut the number of trips back to the boat — the hidden time sink most beginners underestimate on Island 1. On the first island, a single pollution cluster often requires 4–5 round trips with a base-tier Pressure Washer, but extending its range by two tiers drops that to 2 trips, freeing stamina for the heavier Scrub Brush and Suction Hose encounters that arrive at Island 2 and Island 4.
Skill Tree Branches Worth Prioritizing
The full skill tree splits into three branches: Efficiency, Range, and Capacity. Each branch has roughly five tiers, and you earn skill points by completing islands, rescuing animals, and finishing side contracts. Based on community data gathered during the demo preview, the most popular early-to-mid progression path looks like this:
| Priority | Branch | Reason |
|---|---|---|
| 1 | Efficiency Tier 1–2 | Reduces time per cleaning action across all tools |
| 2 | Pressure Washer Range | Lets you cover more shoreline per pass |
| 3 | Trash Grabber Capacity | Fewer reloads, faster beach sweeps |
| 4 | Efficiency Tier 3 | Compounds with Range and Capacity upgrades |
| 5 | Capacity Tier 2 | Unlocks late-game Suction Hose and Sand Blaster potential |
Players who spread points evenly across all three branches consistently report feeling underpowered once they reach Island 5, where the cleaning workload roughly doubles and tougher contaminants like tar deposits and rusted metal demand specialized tool performance. Because the Pressure Washer, Trash Grabber, and Suction Hose each pull from different scaling curves, splitting early investments means none of your tools reach the damage-per-second thresholds required for Island 5's three-star clearance times. Community runs on the demo preview show that committing to Efficiency through Tier 3 first, then layering Range and Capacity upgrades afterward, yields roughly 30–40% faster average cleanup speed on the final islands compared to a balanced allocation.
Nature Return Triggers and Visual Milestones
The "nature return" moment is the emotional payoff of every island, and it is triggered by more than just clearing pollution. Several layered conditions must be met before the transformation plays out in full, and missing even one can leave the island in a half-restored state. is the emotional payoff of every island, and it is triggered by more than just clearing pollution. Several layered conditions must be met before the transformation plays out in full, and missing even one can leave the island in a half-restored state, so cross-checking each requirement against our Island Restoration How To Get 100 Percent walkthrough is the safest way to make sure no single flag has been overlooked.
Primary vs Secondary Restoration Conditions
Every map has one primary condition (usually a set number of pollution nodes cleared) and at least two secondary conditions (rescuing animals, restoring a specific landmark, or activating a beacon). You can finish the primary condition and still see a polluted island if you skip the secondary objectives.
| Condition Type | Typical Requirement | Why It Matters |
|---|---|---|
| Primary Pollution | 100% of all pollution nodes cleared | Required for any transformation |
| Animal Rescue | 1–3 hidden animals per map | Triggers the heart animation and bonus rewards |
| Landmark Repair | Rebuild 1 named structure | Unlocks the next island in the chain |
| Side Contract | Optional timed or quota objective | Awards bonus skill points and cosmetics |
Once every primary and secondary condition is met, the island enters its "ready to transform" state. A glowing aura appears over the map's central landmark; interacting with it kicks off the cutscene in which the environment shifts from gray and saturated to lush and natural. This is the moment the community refers to as the "nature return," and it is what the entire game is built around.
Milestone Progression Across the 12 Maps
The full release ships with 12 maps split across 4 biomes. The progression is roughly linear, but the built-in randomizer (mentioned on the official Steam news post) can shuffle the order of side contracts and minor objectives, so the milestone thresholds stay familiar even on repeat runs.
| Biome | Map Count | Average Pollution Nodes | Visual Shift |
|---|---|---|---|
| Tropical Isles | 3 | 80–120 | Murky water to clear turquoise |
| Temperate Coast | 3 | 100–150 | Gray cliffs to green meadows |
| Arctic Shores | 3 | 120–180 | Dirty ice to sparkling glaciers |
| Volcanic Reach | 3 | 150–220 | Ash fields to flowering rock gardens |
By the time you reach Volcanic Reach — the third biome with its 150–220 pollution nodes per map — each island transformation is a small cinematic event, and the cumulative effect of 12 transformations is what gives the game its 100% completion reward. The ash-field maps in particular demand near-total node clearing before the flowering-rock-garden palette fully resolves, which is why speedrunners typically save Volcanic Reach for last despite the randomizer's shuffle.
Progression Path, Side Contracts, and Efficient Sailing
Speed-running an island restoration progression guide is less about raw cleaning speed and more about route planning. The 4 biomes and 12 maps are designed so that efficient sailing saves more time than any single tool upgrade, and the infinite side contracts give experienced players a way to bank skill points between story islands.
The Recommended Island Order
While the randomizer can shuffle side content, the story order is fixed. Following the developer's intended route is recommended for first-time players because each new biome introduces exactly one new pollution mechanic. Skipping ahead tends to overwhelm new players, because the late-game tools assume familiarity with the base four.
| Stage | Biome | Maps | New Mechanic Introduced |
|---|---|---|---|
| 1 | Tropical Isles | 3 | Oil spills, garbage |
| 2 | Temperate Coast | 3 | Mud-heavy terrain |
| 3 | Arctic Shores | 3 | Ice-based pollution (frozen garbage) |
| 4 | Volcanic Reach | 3 | Ash and mineral buildup |
Each stage adds roughly 25–35 new pollution nodes per map, so the difficulty curve is gentle rather than punishing. The Steam page confirms full controller support, Steam Achievements, and Save Anytime, which means you can drop in and out of any map without losing progress.
Side Contracts and Infinite Replayability
The launch version ships with infinite side contracts — randomized objectives that appear on already-completed islands. They are the primary grind loop once the 12-map story is finished, and they are the main reason the randomizer matters: no two side contracts pull from the same pool twice in a row.
| Contract Type | Reward | Typical Time |
|---|---|---|
| Speed Clean | Bonus skill point | 5–8 minutes |
| Animal Rescue Rush | Cosmetic boat part | 8–12 minutes |
| Pollution-Free Run | Rare upgrade token | 10–15 minutes |
| Landmark Repair Sprint | Skill tree reset token | 12–20 minutes |
Players chasing the full completion percentage should alternate between story islands and side contracts in roughly 2:1 ratio. Pure side contract grinding burns out fast because the maps stop feeling fresh, but mixing in one story island every two contracts keeps the visual variety high.
Boat Customization and the Cosmetic Layer
Boat customization is technically optional for the island transformation loop, but it is the most visible reward system in the game. Every restored island drops cosmetic parts, and assembling a boat that matches your favorite biome is a small but satisfying way to personalize the experience.
Cosmetic Drop Rates and Sources
Cosmetics are split into three categories: hull skins, sail designs, and figureheads. Each category has roughly 20 variants per biome, and most of them are biome-specific, so a sail you earn in the Tropical Isles will not appear in Arctic Shores drops.
| Cosmetic Type | Source | Drop Frequency |
|---|---|---|
| Hull Skins | Nature return rewards | 1 per island transformation |
| Sail Designs | Side contracts | ~15% per contract |
| Figureheads | Animal rescue milestones | 1 per 5 rescues |
A full cosmetic catalog for all 4 biomes is roughly 240 items, which means the cosmetic grind alone can extend playtime well past the 12-map story. Players who care about 100% catalog completion should treat the cosmetic layer as a separate progression track from the main island restoration unlock guide.
Why Cosmetics Matter for Restoration Motivation
A common observation from the demo community is that cosmetics boost motivation on later maps when pollution density peaks. The psychological effect of seeing a fully skinned-out boat sail toward a Volcanic Reach island is real, and it is one of the reasons the developer placed cosmetic drops at the exact moment of nature return rather than at random intervals.
Frequently Asked Questions
What triggers the nature return in Island Restoration?
The nature return fires when you clear 100% of the pollution nodes on a map and complete every secondary objective, including animal rescues and landmark repairs. Once those conditions are met, a glowing aura appears over the central landmark. Interacting with it starts the transformation cutscene in which the environment shifts to its natural state.
How many islands do I need to restore to finish the game?
You need to transform all 12 maps across the 4 biomes — Tropical Isles, Temperate Coast, Arctic Shores, and Volcanic Reach. Each biome has 3 maps, and finishing the final Volcanic Reach map unlocks the ending cinematic plus the New Game+ mode with harder pollution layouts.
Can I replay transformed islands to farm upgrades?
Yes, the built-in randomizer and infinite side contracts let you revisit any restored island indefinitely. Side contracts are the main post-game grind, awarding bonus skill points, cosmetic boat parts, and rare upgrade tokens. The randomizer shuffles objectives so no two side contracts feel identical, which keeps the loop fresh even after 50+ hours of play.
Does the skill tree reset between playthroughs?
Skill points carry over to New Game+ runs, but a rare upgrade token (earned through the Landmark Repair Sprint side contract) lets you reset individual branches if you want to experiment with a different build. The developer confirmed this reset token system during the demo's 4,000-wishlist update, and it is the intended way to try alternative upgrade paths without starting a brand new save.
Is the Island Restoration demo the same as the full game?
The demo covers only the Tropical Isles region with a few upgrades pre-unlocked so you can enjoy the core loop without worrying about progression. The full release adds Temperate Coast, Arctic Shores, and Volcanic Reach, plus the complete skill tree, all 6 cleaning tools, boat customization, and infinite side contracts. Both versions support Save Anytime, full controller input, and Steam Achievements.