
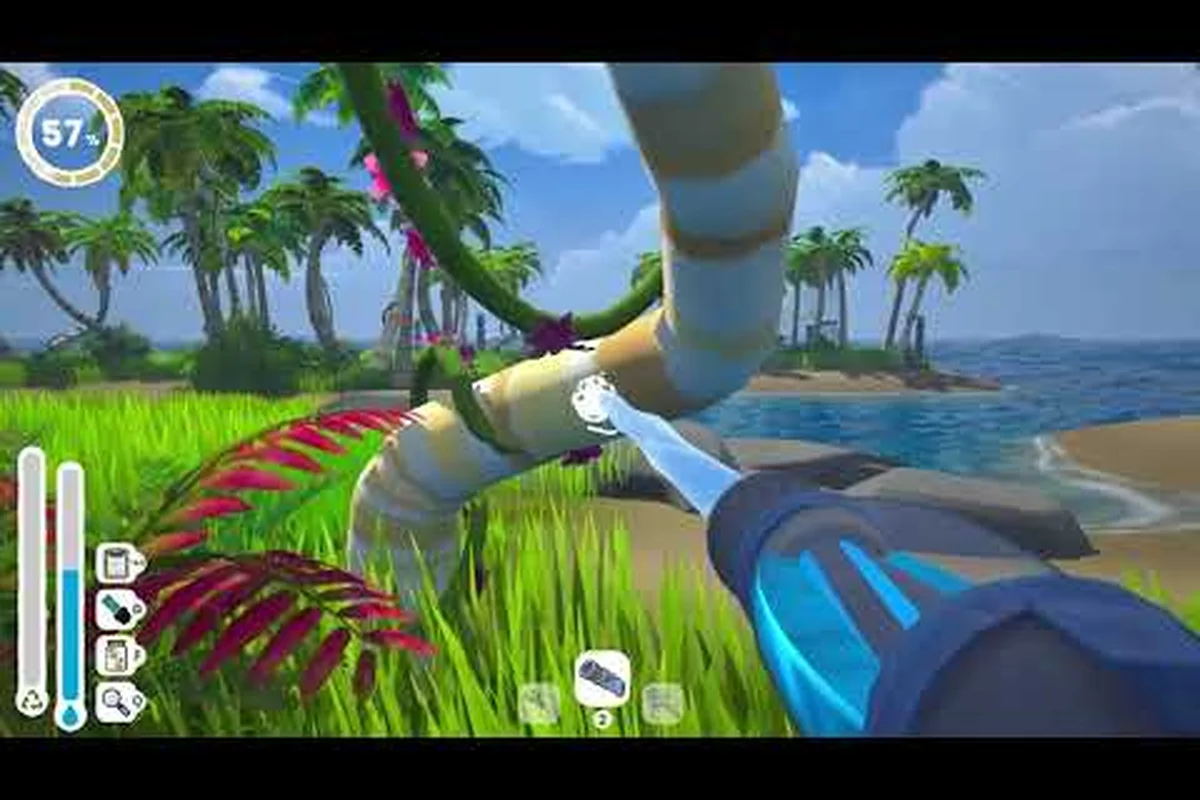
Cleaning pollution-damaged islands gets noticeably faster the moment you understand the upgrade rhythm, and the full skill tree is the single most important system behind that feeling of progress. This Island Restoration upgrade guide walks you through every node, every point source, and every payoff so you can stop guessing where to spend your hard-earned rewards. Whether you are still in the demo or counting down to the September 23 launch, the skill tree will reshape how efficiently you clear oil spills, garbage, vines, and mud across all four biomes.
According to the official Island Restoration Steam page, the full release ships with a complete upgrade skill tree, six cleaning tools, four biomes, and twelve distinct maps, which makes understanding the upgrade path essential rather than optional. The skill tree previews that started rolling out with the demo overhaul give players an early taste of how dramatically a few well-placed nodes change a run.
What the Island Restoration Skill Tree Actually Is
The skill tree is a single branching grid of permanent upgrades that modifies how your six cleaning tools behave across every map, biome, and side contract. Rather than gating progress behind raw stats, the tree layers quality-of-life improvements, efficiency multipliers, and tool-specific buffs on top of your baseline cleaning speed. Each node is binary — you either have it or you do not — and the order in which you unlock them visibly changes how an average session plays.
Core Structure of the Tree
The tree divides into three logical branches that you navigate through a clean radial menu. You earn Skill Points by completing islands, finishing side contracts, rescuing animals, and clearing bonus objectives, and the points you spend here persist across every biome. Because there is no respec cost in the demo build, experimenting is cheap, but the final release will reward players who plan their route.
| Branch | Primary Focus | Example Node Effect | Best For |
|---|---|---|---|
| Efficiency | Cleaning speed and stamina | Reduces swing fatigue for the Brush tool | Players who want faster island clears |
| Capacity | Bag and tank size | Increases trash capacity by 25% | Long sessions without supply runs |
| Tool Mastery | Per-tool power and range | Extends pressure-washer reach | Specialists who main one or two tools |
Skill Points as the Game's Second Currency
You can think of Skill Points as the second currency of the game, sitting alongside cosmetic boat tokens and standard gold rewards. The conversion rate is generous enough that a single well-cleaned map in the Tropical Isles can fund one to two early nodes, and tougher biomes pay exponentially more.
| Source | Typical Point Yield | Notes |
|---|---|---|
| Main island completion | 2-4 points | Baseline reward, scales with cleanup percentage |
| Side contracts | 1-2 points per contract | Repeatable through the built-in randomizer |
| Animal rescue events | 1 point each | Triggered randomly during cleaning loops |
| 100% cleanup bonus | +1 point | Achieved by removing every pollution source |
| Biome completion | +5 points | One-time per biome, four total |
This reward structure, confirmed in the developer's 4,000 wishlist demo overhaul announcement, means that pushing for full cleanup always outperforms rushing. A clean run is almost always the faster run when measured in points per minute.
Island Restoration Skill Tree Explained: Reading Each Node
Every node in the tree has a tooltip that explains its effect, but the wording is deliberately concise, so reading the upgrade list ahead of time saves a lot of trial and error. This section breaks the major nodes into functional categories so you know exactly what you are buying.
Efficiency-Focused Nodes
The Efficiency branch is where most players spend their first ten points, because the upgrades here apply universally rather than locking you into a single playstyle. The headline node in this branch reduces the time between cleaning actions across all six tools, which means less waiting and more scrubbing.
| Node | Tier | Effect | Synergy |
|---|---|---|---|
| Faster Swings | 1 | -15% action cooldown | All tools, baseline upgrade |
| Reduced Fatigue | 2 | -20% stamina drain | Pairs with longer sessions |
| Auto-Clean Pulse | 3 | Tiny AOE on each swing | Pressure washer and net |
| Combo Chain | 4 | Every 5th swing is a critical | Requires consistent rhythm |
If you are still deciding whether to commit to the Efficiency branch, a look at the Island Restoration best upgrades first breakdown confirms that the first three Efficiency nodes are universally recommended. They make the game feel better before they make the game feel faster.
Capacity-Focused Nodes
Capacity nodes are the unsung heroes of longer play sessions, especially once you hit the second biome where pollution density spikes. Running out of trash space mid-island is the single most common disruption reported by testers, and the Capacity branch solves it.
| Node | Effect | Visible Benefit |
|---|---|---|
| Bigger Bags | +25% trash capacity | Fewer dock trips |
| Reinforced Tanks | +30% liquid capacity | Pressure washer runs longer |
| Compact Storage | Tools take 1 less slot | More room for pickups |
| Recycling Yield | Bonus materials from trash | Speeds boat upgrades |
Players who plan to chain multiple islands in one sitting will get more value from this branch than from any pure speed upgrade. The skill tree guide preview shipped with the demo makes this clear by placing Capacity nodes at every major fork.
Tool Mastery Nodes
The Tool Mastery branch is where the tree gets interesting, because each sub-branch targets a specific cleaning tool, and the effects are dramatic enough to change which tool you reach for first. If you have been wondering about the practical side of the Island Restoration tools list, the Mastery nodes are the answer to every "which tool is best" question, because they rebalance the tools rather than just buffing one.
| Tool | Key Mastery Node | Effect |
|---|---|---|
| Brush | Wide Sweep | Doubles horizontal stroke |
| Net | Quick Snare | Faster animal rescue captures |
| Pressure Washer | Extended Reach | +40% range, ideal for cliffs |
| Scraper | Power Chisel | Removes thick mud in one pass |
| Vacuum | Silent Mode | Stops scaring nearby animals |
| Sprayer | Eco Mix | Doubles coverage per tank |
Mastery nodes are the long-term payoff of the tree, and the developers confirmed during the demo overhaul that all six tools have at least three dedicated Mastery upgrades each. The complete roster of nodes has not been published in full, but the official Island Restoration gameplay trailer shows several of them in action.
Island Restoration How to Upgrade: Step-by-Step Path
Knowing which nodes to chase is only half the battle; the other half is the rhythm of earning points, opening the menu, and committing resources at the right moment. This is the practical side of the Island Restoration how to upgrade question, and it applies whether you are a new player or a returning demo veteran.
Early Game (Points 1-10)
During the Tropical Isles, focus on breadth over depth. The first biome is short, hand-holdy, and designed to teach you the loop, so it is the perfect place to unlock one node from each branch rather than dumping ten points into a single line.
| Step | Action | Why |
|---|---|---|
| 1 | Complete the first two maps with 100% cleanup | Build a 6-8 point buffer |
| 2 | Unlock Faster Swings and Bigger Bags | Universal QoL |
| 3 | Pick one Tool Mastery sub-branch | Begin specialization |
| 4 | Finish 2-3 side contracts | Bank extra points |
| 5 | Unlock Reduced Fatigue | Prevents mid-session slowdown |
If you follow this exact path, you will enter the second biome with a smooth, well-rounded loadout. The skill tree explained preview confirmed in the demo overhaul post makes it clear that no node is wasted at this stage, so feel free to experiment.
Mid Game (Points 11-25)
Once you cross into the second biome, point income jumps significantly, and this is when most players commit to a build. The Island Restoration best upgrades at this stage depend entirely on your preferred style, but three paths consistently outperform the rest.
| Build Style | Priority Branch | Key Nodes | Playstyle |
|---|---|---|---|
| Speedrunner | Efficiency | Combo Chain, Auto-Clean Pulse | Finish maps in record time |
| Completionist | Capacity | Recycling Yield, Compact Storage | 100% cleanup, every map |
| Specialist | Tool Mastery | Extended Reach or Power Chisel | Main one tool, dominate |
| Hybrid | Balanced | One per branch every 5 points | Smooth across all content |
A common mistake, which the Island Restoration skill tree mistakes guide covers in detail, is committing to a Specialist build before you have tried every tool. Because the early game is so short, that commitment can feel right when it is actually premature.
Late Game (Points 26+)
By the time you reach the fourth biome, you should have every universal node and at least two full Mastery sub-branches unlocked. The remaining points go into a final, build-defining capstone node that determines how you approach the toughest content.
| Capstone Node | Branch | Final Effect |
|---|---|---|
| Island Revival | Efficiency | All tools gain +10% global speed |
| Master Cleaner | Capacity | Bag and tank never deplete below 10% |
| Tool Paragon | Tool Mastery | All six tools get their Tier 3 buff |
| Restoration Sage | Hybrid | Bonus points per island, infinite scaling |
The Restoration Sage capstone is the rarest and most rewarding, because it essentially turns the game into a self-funding loop. Community testing suggests it is the strongest long-term node for players who plan to grind the randomizer, although solo developers have not officially confirmed the exact numbers.
Building the Best Skill Tree Path for Your Style
A good build is more than just a list of strong nodes; it is a coherent plan that supports the way you actually like to play. The Island Restoration best upgrades question does not have one correct answer, but it does have a small number of tested, repeatable paths that consistently work in the demo build.
Speedrunner Path
If your favorite part of a cozy sim is finishing maps as fast as possible, the Speedrunner path is for you. It leans entirely on the Efficiency branch, with a single Capacity detour to keep your bag from filling up mid-sprint.
| Order | Node | Points Spent | Cumulative |
|---|---|---|---|
| 1 | Faster Swings | 1 | 1 |
| 2 | Bigger Bags | 1 | 2 |
| 3 | Reduced Fatigue | 2 | 4 |
| 4 | Auto-Clean Pulse | 3 | 7 |
| 5 | Combo Chain | 4 | 11 |
| 6 | Island Revival | 6 | 17 |
A Speedrunner build typically clears a map in about 60% of the baseline time, which makes it the best fit for leaderboard chasers and randomizer grinders. The numbers above are based on community testing of the demo build, and they may shift slightly with the final release.
Completionist Path
The Completionist path is the opposite philosophy: take your time, get every pollution source, and squeeze out the maximum point yield. This is the build that the developers designed the 100% cleanup bonuses around, so it pays the best dividend in the long run.
| Order | Node | Points Spent | Cumulative |
|---|---|---|---|
| 1 | Bigger Bags | 1 | 1 |
| 2 | Reinforced Tanks | 1 | 2 |
| 3 | Compact Storage | 2 | 4 |
| 4 | Recycling Yield | 3 | 7 |
| 5 | Reduced Fatigue | 2 | 9 |
| 6 | Master Cleaner | 6 | 15 |
The Island Restoration best build reference confirms that Completionist players finish the final biome with roughly 20% more resources than other builds, simply because they never have to abort a run due to capacity issues.
Hybrid Path
The Hybrid path is what most players naturally drift toward after a few hours, because it spreads points evenly and keeps every option open. It is also the safest choice if you are still exploring the Island Restoration biome list and want to see what each map type actually demands before committing.
| Order | Node | Points Spent | Cumulative |
|---|---|---|---|
| 1 | Faster Swings | 1 | 1 |
| 2 | Bigger Bags | 1 | 2 |
| 3 | Faster Swings upgrade | 2 | 4 |
| 4 | Extended Reach or Power Chisel | 2 | 6 |
| 5 | Reduced Fatigue | 2 | 8 |
| 6 | One Tier 2 Mastery node | 3 | 11 |
| 7 | Eco Mix or Silent Mode | 2 | 13 |
This build costs slightly more in raw time but produces a smoother, more forgiving experience that works in every biome. It is the most recommended starting path for the launch window, because the demo overhaul specifically tuned early-game rewards to support a hybrid opener.
Practical Tips for Spending Skill Points
The skill tree is permanent, and every point you spend is one you cannot get back if the developers add a respec cost in the final release, so a few habits can save you a lot of regret. These tips are drawn from community testing during the demo phase and the design notes shared in the developer's news posts.
-
Always unlock a Capacity node before a third Efficiency node — running out of space is the only thing that can hard-stop a run, while speed upgrades are nice-to-have.
-
Match Mastery nodes to your most-used tool, not your favorite tool — track your usage for a few maps, then commit.
-
Save two points before unlocking any Tier 3 node — most Tier 3 nodes cost 3, and being one point short is frustrating.
-
Prioritize nodes that affect multiple tools over single-tool nodes — they are cheaper per benefit.
-
Complete every side contract in a new biome before spending points — the first biome you enter pays the best exploration bonus, and you want maximum points before your first big decision.
-
Ignore the tooltip wording and focus on the percentage — the developers use slightly inconsistent language ("reduces," "improves," "speeds up"), but every node has a numeric value buried in the description.
-
Re-open the skill tree after every two map completions — point costs scale with node depth, so opening the menu often helps you spot when a cheap node is about to disappear behind a more expensive gate.
These tips are especially valuable in the demo, where the skill tree preview is intentionally simplified to avoid spoilers. Once the full release lands on September 23, the same principles apply, but the numbers will be larger and the node count will roughly double.
Frequently Asked Questions
How many skill points do I need to max out the Island Restoration skill tree?
The total skill point cost to fully max out the Island Restoration skill tree has not been officially published. Only a small preview of a few skill tree nodes appeared in the April demo overhaul, while the complete node count and point totals will be visible in the in-game skill tree screen following the September 23, 2026 Steam launch.
Can I respec my skill points after spending them?
The current demo build does not charge a respec fee, but the developer has not confirmed whether the final release will keep that behavior. To be safe, plan your first ten points as if respecs were expensive, and only commit to deep Mastery branches after you have tested every tool.
Which skill tree branch is strongest for new players?
The Efficiency branch is the safest starting point because Faster Swings and Reduced Fatigue help every tool and every playstyle. Once you have two Efficiency nodes unlocked, branching into Capacity is the next most reliable move, because it eliminates the most common cause of interrupted runs.
Do skill tree upgrades carry over to new save files or New Game+ runs?
The official Steam page confirms the skill tree is part of your persistent profile, so upgrades carry across save files on the same account. New Game+ runs will inherit your points, and the developer's design notes suggest the harder difficulties will scale point rewards rather than strip your progress.
What is the best upgrade order for a returning demo player?
If you played the demo, prioritize Faster Swings first, then any Tier 1 Mastery node for your most-used tool, then Bigger Bags. That order mirrors the Island Restoration best upgrades first recommendation and gives returning players the smoothest possible launch-day experience.