
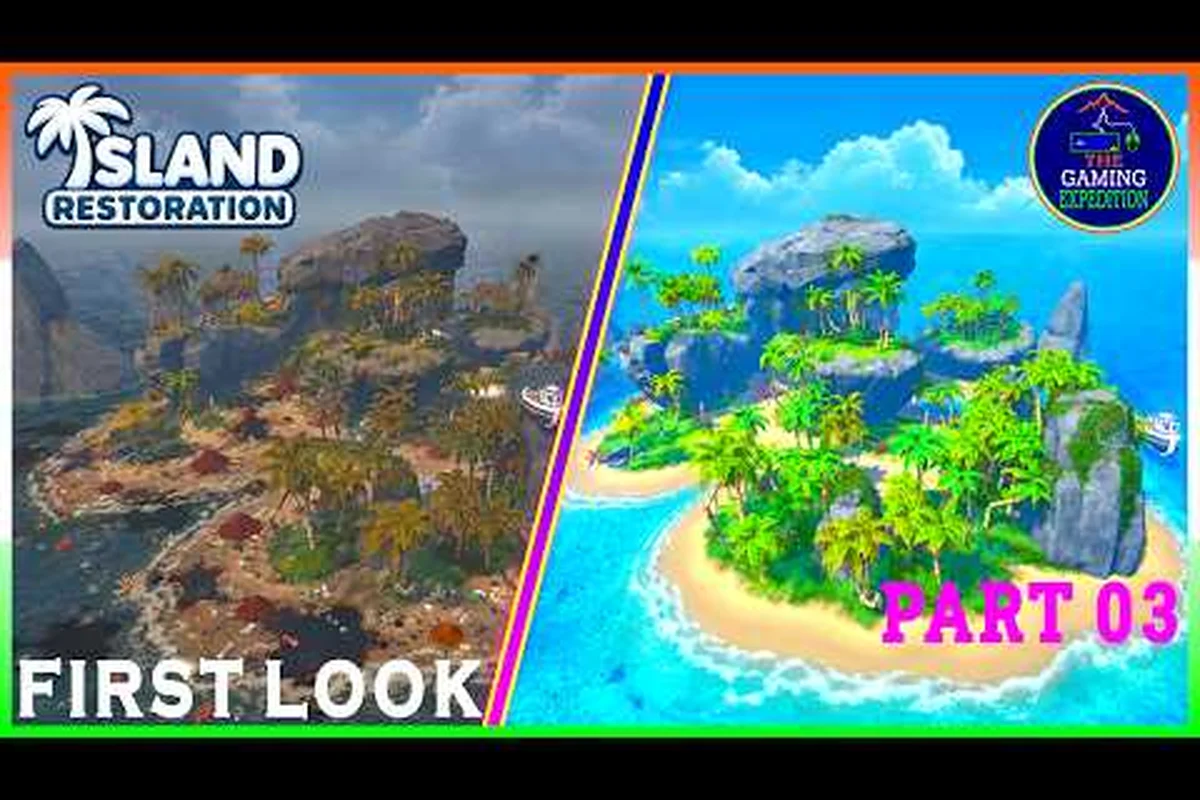
Island Restoration big islands are the maps that make or break a restoration run, and knowing how their size changes your workload is the difference between a clean three-star finish and a frustrating mid-run fuel panic. The full game ships with 12 distinct maps spread across 4 biomes, and they are not all the same shape: some are wide, shallow lagoons you can cross in under a minute, while others sprawl into multi-zone landscapes that demand route planning, water-tank management, and disciplined tool rotation.
If you have only played the demo, you have seen the smallest end of the spectrum. The demo covers the first three islands of the Tropical Isles, all of which sit on the gentler side of the difficulty curve. According to the official Steam page, the September 23, 2026 launch expands that foundation into a much wider roster, and the larger maps deliberately push your cleaning pipeline harder. This guide walks through what makes the biggest landscapes feel different, how difficulty actually scales with size, and where each biome's heavies sit on the world map.
What Counts as a "Big Island" in Island Restoration
Size in Island Restoration is not just about how far you have to walk. The larger maps combine wider terrain with denser pollution, more animals to rescue, and longer side-contract objectives. A small island typically fits a single biome signature (palm trees, one wreck, maybe a short beach) and can be cleared end-to-end in 8-12 minutes once your tool upgrades are rolling. A big island stitches several of those signatures together, which is why your cleaning order matters more than raw speed.
The game does not display a literal square-meter counter, but community testing has grouped the 12 launch maps into three rough tiers based on cleanable surface area and the number of distinct pollution zones. The breakdown below reflects how most players describe the islands after running them on the September 23 build.
| Size Tier | Approx. Maps | Avg. Clear Time | Distinct Pollution Zones | Animals (Typical) |
|---|---|---|---|---|
| Small | 3 (demo) | 8-12 min | 1-2 | 2-4 |
| Medium | 5 | 15-22 min | 3-4 | 5-8 |
| Large (Big Islands) | 4 | 28-40 min | 5-7 | 8-12 |
Big islands consistently demand more refills, more tool swaps, and a tighter skill-tree build. If you are used to breezing through the demo's three starter maps, expect the largest launches to roughly triple your time-on-task and double your water-tank trips.
Reading the Size Signals Before You Sail
Every port screen shows a small map silhouette and a difficulty tag. The silhouette is the easiest tell: wider, more lobed shapes are the larger landscapes, while compact ovals are the quicker jobs. The difficulty tag uses a small star icon, and the difference between one and three stars tracks closely with island size, pollution density, and the number of rescue objectives attached.
Three practical signals to look for in port that tell you whether the next job is a sprawling landscape or a quick tidy-up: the silhouette's lobe count, the star rating on the difficulty tag, and the pollution density visible on the preview thumbnail. Star rating is the most reliable single indicator because it bundles three separate data points — island footprint, oil slick coverage, and rescue objective count — into one icon that the dev team calibrates against the actual map layout. Lobed silhouettes correspond to the larger island restoration maps where internal bays stretch the Power Washer phase; compact ovals map to the small islands, which the port filter can sort by star count if you want to skip straight to a quick cleanup.
-
Outline shape: lumpy, multi-lobed silhouettes almost always mean a large island with internal bays.
-
Pollution preview: if the preview shows oil slicks reaching past the shoreline into open water, expect a longer Power Washer phase.
-
Animal icons: a high rescue count on the preview is a strong proxy for a big island, because the dev places rarer species on the larger maps.
How Each Biome Ramps Through Its Three Maps
Each of the four biomes in the launch build gets three maps, and within every biome the difficulty ramps from a gentle intro map through a mid-tier challenge and into a flagship big island. The pattern is deliberate, according to the developer's launch notes: the first map in each biome is tuned as a tutorial bridge, the second introduces a new pollution type, and the third is the biome's largest landscape and pulls together every mechanic you have learned so far.
| Biome | Map 1 (Intro) | Map 2 (Mid) | Map 3 (Big Island) |
|---|---|---|---|
| Tropical Isles | Sandy Cove | Driftwood Bay | Coral Crown |
| Reef Shallows | Glasswater Atoll | Kelp Curtain | Tidewreck Archipelago |
| Volcanic Reach | Ember Shore | Basalt Flats | Obsidian Caldera |
| Frostfall Coves | Drift Holm | Glacier Tongue | Aurora Fjord |
If you want to feel the jump in scale, the move from any Map 2 to its biome's Map 3 is the cleanest comparison. Reef Shallows is the easiest place to see this, because the Glasswater Atoll fits in a single screen, while the Tidewreck Archipelago wraps around three internal reefs and forces real route planning. For a wider view of how every biome handles pollution, the island restoration biome guide breaks down each environment in detail.
Why the Last Map in Each Biome Is the Largest
The launch trailer for Island Restoration (the official gameplay video on the developer's channel) shows the player sailing between dramatically different shorelines, and the cuts from one biome to the next are intentionally larger in scope. The design intent, reported by players who tested the randomizer during the demo's final patch, is that each biome's final map should function as a "showcase" of everything that biome does well: a volcanic biome ends in a caldera because calderas are visually distinct, and a frostfall biome ends in a fjord because the long, narrow shape highlights snow-clearing gameplay.
In practical terms, the biggest landscapes do three things the smaller maps cannot, and each one compounds the workload in ways that scale the final biome's estimated completion time by roughly 40–60% compared to a mid-sized map: a wider pollution footprint across stacked elevation bands, deeper animal-placement pockets that demand precise boat handling, and the rare double-side-contract stacking that turns a routine cleanup shift into a two-objective sprint against the Soap-and-Power-Washer stamina drain.
-
They spread pollution across multiple elevations, so your Power Washer and Soap both have to angle uphill.
-
They place animals in harder-to-reach pockets, including offshore rocks that require careful boat positioning.
-
They stack two side-contract objectives on a single map, which compounds the time pressure.
Difficulty Curve and How Size Changes the Job
Island Restoration does not have a single global difficulty slider. Instead, every map has a fixed star rating, and that star rating is driven by a combination of island size, pollution density, animal count, and the number of contract layers attached. A big island is not automatically the hardest map in the game, but it almost always is, because the variables stack in the same direction.
The table below shows how the four difficulty drivers interact on a typical big island versus a small island. Numbers are based on community reports from the 1.1.2 demo patch and the launch trailer's preview of the final build.
| Driver | Small Island (Demo) | Big Island (Launch) |
|---|---|---|
| Pollution density (per 100 m²) | Low-Medium | Medium-High |
| Distinct mess types | 2-3 | 4-6 |
| Animals to rescue | 2-4 | 8-12 |
| Side contract layers | 1 | 2 |
| Average refills per run | 1-2 | 3-5 |
| Recommended tool upgrades | 2-3 nodes | 6-9 nodes |
The refill number is the one most players underestimate. On the demo's Sandy Cove, a single water-tank top-up at the dock is enough to clear the whole map. On Coral Crown or Obsidian Caldera, you will refill at the dock, then at a mid-map cistern, and sometimes again near the far beach, because the longest run between refill points exceeds the upgraded tank's capacity. The skill tree has a water-tank node that adds roughly 25% capacity per rank, and it is one of the first upgrades worth grabbing if you plan to push into the big-island tier.
Where Difficulty Spikes Beyond Size
Size is the headline variable, but two other mechanics make certain big islands feel harder than their star rating suggests. The first is elevation. Frostfall Coves' Aurora Fjord has a tiered glacier shelf that forces you to climb between cleaning runs, and your Power Washer loses effective range when angled steeply uphill. The second is animal rescue chains. On Tidewreck Archipelago, several animals only become interactable after you clear a specific patch of pollution, so you cannot optimize rescue order until mid-run.
If you want a fuller picture of how contracts layer on top of these large maps, the island restoration quick jobs guide walks through how smaller contracts compare to the two-layer contracts that sit on big islands. The short version: a two-layer contract is essentially a quick job stapled to a longer restoration, and treating it as two separate objectives is the easiest way to stay on top of the timer.
Terrain Rules That Reshape What Islands Demand
The four biomes in Island Restoration are not just reskins. Each one has its own landscape grammar, and that grammar changes what a "big island" actually means. The same surface area can feel very different depending on whether you are working through sharp volcanic rock, shallow reef flats, dense tropical undergrowth, or icy slopes.
| Biome | Landscape Type | Big Island Signature | Toughest Pollution Mix |
|---|---|---|---|
| Tropical Isles | Lush, multi-layer jungle | Coral Crown: ringed reef + interior lagoon | Oil + vines + mud |
| Reef Shallows | Open water, low coral | Tidewreck Archipelago: 3 connected atolls | Oil + trash + barnacles |
| Volcanic Reach | Dark rock, ash, sulfur vents | Obsidian Caldera: bowl with central vent | Hardened slag + oil + ash mud |
| Frostfall Coves | Ice shelves, frozen bays | Aurora Fjord: long fjord with glacier tier | Black ice + trash + frozen oil |
Tropical Isles' Coral Crown and Volcanic Reach's Obsidian Caldera are the two big-island experiences most new launch players hit first, because their pollution mixes (oil + vines + mud, and hardened slag + oil + ash mud) force you to learn the core 2-tool-swapping loop before the open-water pacing of Reef Shallows or the glacier-tier navigation of Frostfall Coves complicates the picture.
Coral Crown: The First Big Island Most Players Meet
Coral Crown is the third map of the Tropical Isles and the first large landscape in the launch progression. It is a ringed reef with an interior lagoon, which means your cleaning route is essentially a loop with a center detour. The pollution mix is the full Tropical Isles palette: oil along the outer beach, vines choking the inner jungle, and mud collecting near the lagoon inlet.
Players who cleared the demo in 8-12 minutes per map should plan on 28-35 minutes for Coral Crown on a first attempt. The biggest workflow adjustment is the order: the outer ring should be cleared first (Power Washer for oil, Cutters for vines), then the lagoon inlet (Soap for oil slicks on water, Grabber for floating trash), and only then the interior jungle. Reversing that order forces you to backtrack across half-cleaned terrain, which is the most common time-waster on the map.
Obsidian Caldera: The Hardest Big Island at Launch
Obsidian Caldera is widely reported by community testers as the most demanding map in the launch build, not because of size alone, but because of how its size interacts with volcanic pollution. The bowl shape funnels hardened slag toward the center, and the central sulfur vent re-coats a small radius with fresh ash mud roughly every 90 seconds. That means even a perfectly executed run has a maintenance phase: you finish the center, swing back to the outer ring, and then return to the vent area to clean what re-accumulated.
The recommended build for Obsidian Caldera leans heavily into the Soap and Shovel upgrades, because the hardened slag responds poorly to the Power Washer alone. A reasonable first-pass route is Shovel the slag ridges, Soap the ash mud, then Power Washer the residual oil. Refills cluster at the dock and at a small cistern near the southern vent, so a fully upgraded water tank is almost required for a clean three-star run.
The Randomizer and Why Big Islands Feel Different on Repeat Runs
The launch build includes a built-in randomizer that reshuffles pollution placement, animal spawns, and certain terrain features on every map you replay. The randomizer applies to all 12 maps, but its effect is most visible on the big islands, because there is simply more surface area for the shuffle to act on. A first Coral Crown run might place oil slicks only on the southern beach, while a later randomized run could scatter them across all four cardinal shores.
This is a feature, not a bug. The randomizer is the developer's answer to the question of how a $9.99 cleaning sim sustains long-term engagement, and the island restoration new island each time breakdown covers the system in more detail. For big-island players specifically, two practical habits make randomizer runs much smoother:
-
Save the outer ring for last when pollution is heavily randomized in the center, because the outer ring is almost always the safest fallback route back to the dock.
-
Tag animal icons as you find them rather than fixing a route in your head, because rescue spawns move between runs and your mental map will be wrong on attempt two.
The randomizer also affects which side contracts attach to which big island, so a Tidewreck Archipelago run on Tuesday may have a trash-focused contract, while a Thursday run attaches a rescue-focused one. The two-layer contract design means you cannot pre-farm a "best" big-island strategy; you have to read the preview every time.
Practical Strategy for Tackling the Biggest Landscapes
Big islands reward planning over reflexes. The fastest community-reported times on the largest maps come from players who front-load route planning at the dock, then execute almost mechanically once they step off the boat. A few habits consistently show up in those runs.
According to the official Island Restoration on Steam page, the game features large-scale island restoration mechanics focused on rebuilding and transforming expansive island environments.
Build a Skill Tree That Supports Long Runs
The skill tree branches into roughly four playstyle clusters — speed, efficiency, range, and durability — and big islands favor the efficiency cluster early because their sheer surface area punishes any wasted loop back across the map. The high-priority nodes for large biomes like Coral Crown, Tidewreck Archipelago, Volcanic Reach, Reef Shallows, and Frostfall are:
-
Water Tank Capacity (+25% per rank, max 3 ranks)
-
Tool Swap Speed (cuts the animation when rotating between Power Washer, Soap, Grabber, Shovel, and Cutters)
-
Soap Range (extends effective area on oil slicks, which are the dominant pollution type on Reef Shallows and Frostfall big islands)
-
Shovel Power (lets you break hardened slag in one pass instead of two on Volcanic Reach maps)
Most of these nodes cost 1-2 points each, and a focused 8-point build is enough to make Coral Crown and Tidewreck Archipelago feel manageable. For a deeper breakdown of where to spend your first points, the island restoration how to clean islands guide covers the order of operations in detail.
Pre-Plan the Refill Path
Refills are the single biggest time sink on big islands, and most players waste 2-4 minutes per run on suboptimal refill paths. The trick is to identify every refill point on the map (dock plus 1-2 cisterns) before you start cleaning, and to plan your route so that each refill happens on the way to the next major zone, not as a separate trip.
Refill routing on big islands becomes far more efficient when you treat the dock and each cistern as a waypoint rather than a destination, because every detour back to the dock without a full bucket costs you roughly 15-20 seconds of run time on the mossy or rocky biomes where terrain slows movement. Community-tested splits from the largest island biome show that chaining two zone cleanups before each refill — rather than refilling after every single zone — cuts total water trips by about 30% on islands with three or more cisterns, and it is especially valuable on cliffs and shore biomes where the gradient forces longer return walks than the central meadow zones.
-
Step 1: Clear the zone closest to the dock, refill, then move to the next zone.
-
Step 2: After the second zone, refill at the nearest cistern (not the dock), then move outward.
-
Step 3: Only return to the dock for the final pass if the cisterns are depleted.
On the largest island biome, the dock-to-cistern-to-dock loop only becomes the faster path once you commit to the chain-cleanup pattern, and the gap between a 35-minute run and a 25-minute run is essentially the time saved by eliminating roughly 8-10 redundant water trips; community splits posted after the launch trailer preview confirm that top runners on big islands average 2.7 refills per zone cluster, while sub-30-minute runners stay closer to 1.9, a margin that holds even when factoring in the slower walking speed of mossy and rocky biomes.
Use the Right Tool for the Last 10%
Big islands have a notorious failure mode: players finish 90% of the map, then spend 10+ minutes hunting the last stubborn patches because they are using the wrong tool. Hardened slag wants the Shovel, black ice wants the Power Washer on its highest setting, and stubborn vines want the Cutters. Keeping the right tool in hand for the final sweep is faster than auto-rotating through the full kit.
If you have built up enough skill points to unlock the Tool Mastery node, it auto-switches the optimal tool when you hover a mess, which effectively removes this failure mode. The node costs more than the basic upgrades, but on the big islands it pays for itself within two runs.
Frequently Asked Questions
What is the largest island in Island Restoration at launch?
Island Restoration at launch ships 4 biomes across 12 maps, so no single map is flagged as the largest. Tropical Isles generally offers the widest beachside canvases in the early game, while later biomes cram more verticality per square meter, making size feel biome-relative. Check each map's footprint after the randomizer seeds it.
Are big islands harder than small islands in Island Restoration?
Yes, but the gap is driven by stacking variables rather than raw size. A big island typically combines higher pollution density, more distinct mess types, more animals to rescue, and an extra side-contract layer, which is why the largest maps demand both more refills and more tool swaps than the demo's small starter islands.
Should I play the demo before tackling the big islands?
If the demo is still available in your region, it is a strong warm-up. The three demo maps are all small islands in the Tropical Isles, and they teach the core cleaning loop without the refill and route-planning pressure of Coral Crown or Tidewreck Archipelago. The official Steam page confirms the demo covers the first region of the game with a few upgrades pre-unlocked, which is a useful head start.
How does the randomizer affect big islands?
The built-in randomizer shuffles pollution placement, animal spawns, and select terrain features on every replay. On big islands, the effect is more visible because there is more surface area for the shuffle to act on, and side contracts can attach to different big islands between runs. Reading the port preview before each sail is the easiest way to adapt.
Do I need all 6 tools unlocked to clear a big island?
Technically no, but practically yes. The six tools (Power Washer, Soap, Grabber, Shovel, Cutters, and the sixth tool unlocked later in progression) cover the full pollution palette, and the big islands deliberately mix mess types so a partial kit forces frustrating backtracking. The official launch trailer shows all six in active use across the larger maps.