
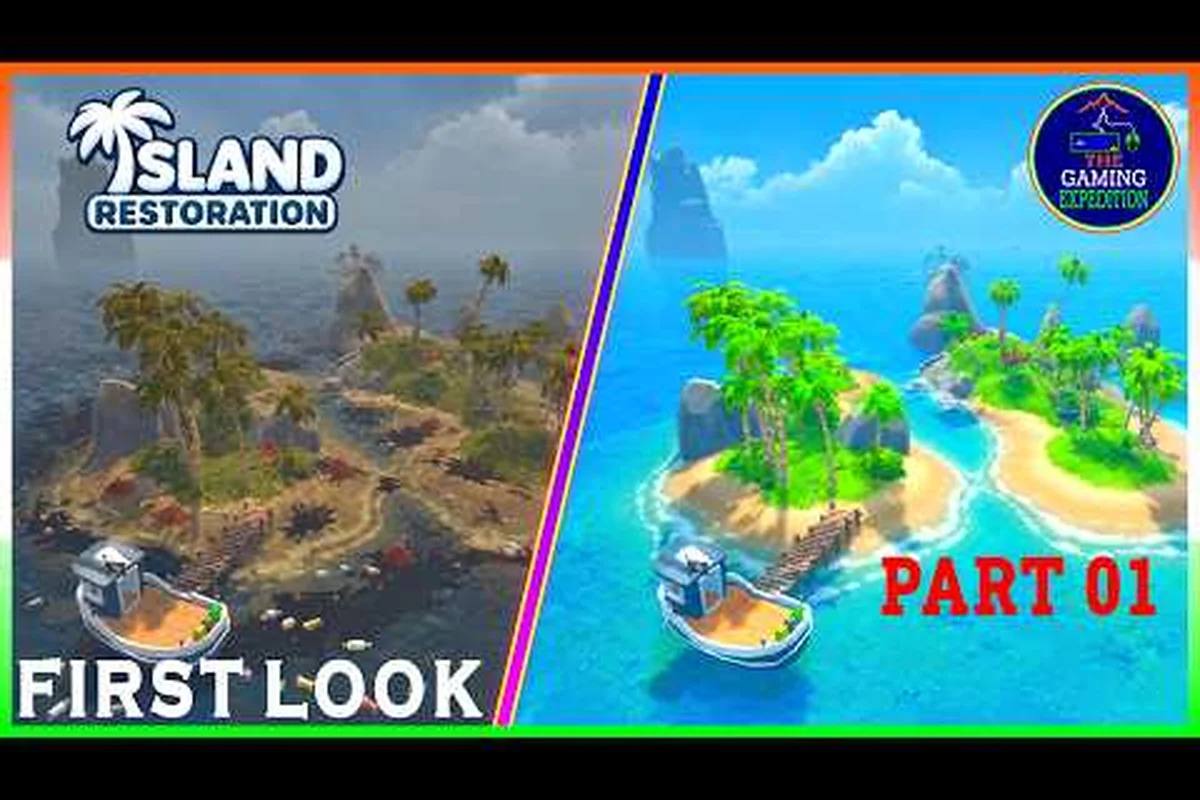
Cleaning a polluted island sounds simple until you sail into your third coral bay and realize every tropical cove hides a different mess. That variety is the whole hook of Island Restoration biomes, the four distinct regions that split the game's 12 maps into visually and mechanically different playgrounds. Solo developer EliteTheDev built the full release around the idea that no two restoration runs should feel the same, and the result is a cozy cleaning sim where the environments themselves are the real star.
According to the official Island Restoration on Steam page, the game ships with four biomes spread across twelve maps, a built-in randomizer, and infinite side contracts that keep each session feeling fresh. The full release went live on September 23, 2026, priced at $9.99 with a 10% launch discount. This guide breaks down every region, explains how the randomizer reshuffles your next island, and shows you how map variety ties directly into replay value.
The Four Island Restoration Biomes and What Sets Them Apart
The four biomes in Island Restoration aren't just reskins of the same beach. Each region introduces different pollution sources, different terrain features, and different animal rescues, which means your cleaning toolkit shifts in priority as you sail between maps. The September 23 launch announcement confirmed that all four biomes ship at launch, and the developer has been teasing the biome variety since the demo overhaul earlier in 2026.
Tropical Isles — The First Region and the Demo's Home
Tropical Isles is the gateway biome, and it's the region most players will recognize because the entire demo (launched May 18, 2026) is set here. The maps lean into white sand, turquoise water, and palm-thick shorelines littered with oil slicks, plastic waste, tangled vines, and thick mud. The terrain is forgiving, with mostly flat beaches and shallow bays, which makes Tropical Isles the ideal training ground for learning the six cleaning tools.
Players who tested the demo overhaul report that the redesigned Tropical Isles maps feature improved flow and visual detail, plus a small preview of the upcoming skill tree so you can test upgrades early and see how they change your cleaning efficiency. The demo starts with a few upgrades already unlocked, which lets you enjoy the core loop without worrying about progression gating.
The Remaining Three Biomes — A Quick Preview
While the full game ships all four biomes at launch, players discover them in sequence as they restore islands and earn enough progress to unlock new regions, so Region 1 always lands first and Region 4 serves as the final progression gate. Each biome pushes a different cleaning challenge tied to the randomizer's mix-and-match logic, which is why later island restoration biomes test tool mastery against denser debris spawns.
-
Region 2 leans into denser vegetation and more entrenched pollution, which means the Shovel and Power Washer get more screen time than the Grabber.
-
Region 3 swaps sandy beaches for rocky shores and colder water, introducing salt-crusted debris that requires the Pressure Washer's sustained output.
-
Region 4 caps the progression with the most complex terrain and the toughest pollution mixes, where every tool in your kit sees regular use.
Because the randomizer mixes and matches map elements within each biome, no two runs through the same region play out identically. The next section breaks down the full count of Island Restoration maps and how they distribute across the four biomes.
How the 12 Maps Distribute Across the Four Biomes
The full release of Island Restoration includes twelve distinct maps split evenly across the four biomes, which means each region gets three maps to explore, clean, and master. That even split matters because it gives every biome enough variety to feel like a real place rather than a reskinned tutorial level, and it gives the randomizer enough map fragments to shuffle before handing you your next contract.
The Full Map Roster at a Glance
| Biome | Map Count | Visual Identity | Dominant Pollution Type |
|---|---|---|---|
| Tropical Isles | 3 | White sand, palms, turquoise bays | Oil slicks, plastic, mud |
| Region 2 | 3 | Dense jungle edges, overgrown coves | Vines, mud, embedded trash |
| Region 3 | 3 | Rocky shores, colder water, grey skies | Salt-crusted debris, oil |
| Region 4 | 3 | Mixed terrain, complex coastline | All pollution types combined |
The biome map variety also matters for animal rescues, because each region hosts different species that need help. The demo overhaul news post introduced new gameplay mechanics for rescuing and helping animals, and the developer has confirmed that the full release includes "more cute animals to find and pet" across all four biomes. That means a run in Region 4 might surface a species you didn't even know existed in earlier regions.
Why Twelve Maps and Not More
Twelve maps is a deliberate design choice that trades raw count for depth per location. Each map has enough surface area and enough pollution density to support a 20-40 minute cleaning session, which means the full Island Restoration map roster delivers roughly 6-8 hours of core content before side contracts and randomizer runs start layering on top. Players who push into the randomizer and the infinite side contracts can easily double that playtime, because the randomizer pulls from the same twelve maps but rearranges spawn points, pollution clusters, and animal locations every time you generate a new island.
If you want a deeper look at the full map roster and which order they unlock in, the all maps guide breaks down each location individually. The next section zooms in on the environments themselves, because biome variety is about more than just map count.
Biome Environments, Hazards, and Pollution Profiles
Each of the four Island Restoration environments ships with its own pollution profile, which means the right tool for the job changes as you sail into a new region. The official Steam page lists six cleaning tools total, but you don't use all six equally on every map. The environment dictates priority, and learning that priority is the real skill curve.
Pollution Density by Region
| Biome | Oil Spills | Garbage | Vines | Mud | Salt Crust |
|---|---|---|---|---|---|
| Tropical Isles | High | High | Medium | High | Low |
| Region 2 | Medium | High | High | High | Low |
| Region 3 | High | Medium | Medium | Medium | High |
| Region 4 | High | High | High | High | High |
The pollution distribution matters because it directly affects which of the six tools you reach for first. In Tropical Isles, the Grabber and Shovel do the heaviest lifting because the oil and mud sit on top of the sand. In Region 2, vine coverage forces you to prioritize the Shears or whatever cutting tool the kit includes, while Region 3's salt-crusted debris rewards sustained Power Washer use. Region 4 throws everything at you at once, which is why it sits at the end of the progression chain.
How Environments Drive Replay Decisions
The environment variety also affects how you approach side contracts. A contract in Tropical Isles might focus on oil spill cleanup, which is a Grabber-and-Shovel job, while a Region 4 contract could demand a full toolkit rotation. That variety is intentional, because the developer wants each contract to feel like a small puzzle rather than a repeat of the last session.
Players who want to deep-dive into which hazards each biome throws at them and which tool combinations work best should check the biome hazards guide for a more granular breakdown. The next section covers the feature that ties all this variety together: the built-in randomizer.
The Island Restoration Randomizer and How It Reshuffles Your Next Run
The randomizer is the single biggest replay lever in Island Restoration, and it's the reason the four biomes feel fresh long after you've cleared every map once. According to the official Steam page, the game ships with "endless replayability from a built-in randomizer and infinite side contracts," and that combination is what turns a 6-8 hour core campaign into something you can sink dozens of hours into.
How the Twelve-Map Pool Is Re-Seeded
Rather than procedurally generating new island restoration biomes from scratch, the randomizer draws from a fixed pool of twelve hand-crafted island restoration maps spanning the game's six core regions, then shuffles biome-specific elements like oil spill clusters, rescue zones, and pollution density profiles before each session. This means the Arctic tundra and tropical reef biomes you play on are the same tilesets every player has, but their interactive layers — where debris accumulates, which shoreline gets the first contamination event, how the wind-driven currents push slicks inland — are all re-seeded from a randomization table. The result preserves each region's visual identity and hand-tuned terrain while ensuring that island restoration environments feel genuinely unpredictable across runs.
-
Pollution spawn points shift, so the oil spill that sat in the northwest bay on your last run might appear on the east beach this time.
-
Animal locations move, which means rescue routes change every session.
-
Side contract objectives rotate, so a "clean all oil spills" contract on Monday becomes a "rescue 5 animals" contract on Tuesday.
-
Weather and lighting vary, which affects visibility and the way pollution reads against the terrain.
That layered shuffling means even maps you've fully cleared before still hold surprises, because the randomizer changes the puzzle even when it doesn't change the board. Community testing suggests a typical randomizer run takes 15-25 minutes, which makes it perfect for short sessions between longer restoration arcs.
Randomizer vs. Story Mode — Which to Pick
| Mode | Map Order | Pollution Layout | Best For |
|---|---|---|---|
| Story Mode | Fixed progression | Set by biome | First playthrough, learning tools |
| Randomizer | Shuffled | Randomized | Replay, side contracts, short sessions |
| Side Contracts | Pulled from both | Variable | Targeted challenges, animal rescues |
If you want to see how randomizer runs compare to the main campaign and which mode fits your playstyle, the paradise islands exploration guide walks through the differences in more detail. The next section pulls everything together into a practical recommendation for new players.
How to Pick Your First Biome Run and Make the Most of Map Variety
New players often ask whether they should rush through the four biomes in story order or jump straight into the randomizer once Tropical Isles feels comfortable. The honest answer is that both paths work, but they reward different playstyles. Story mode teaches the tool kit in a controlled environment, while the randomizer throws curveballs that test whether you really understand which tool fits which pollution type.
A Practical Biome Progression Path
If you're starting fresh, the most efficient path through the four biomes looks like this: Tropical Isles (Region 1, 3 maps) → Aurora Peaks (Region 2, 3 maps) → Volcanic Reach (Region 3, 3 maps) → Mystic Shores (Region 4, 3 maps), which totals the full island restoration 12 maps. This biome order deliberately escalates pollution density, tool complexity, and weather hazards in a smooth curve, so each region's mechanics build directly on skills you cemented in the previous one rather than dumping new systems on you all at once.
-
Spend your first 2-3 hours in Tropical Isles to learn all six tools and understand the core cleaning loop. The demo is a perfect training ground if you want to practice before buying.
-
Clear the first Tropical Isles map fully before sailing to Region 2, because the upgrade skill tree rewards map completion, and you'll want those upgrades before tackling denser pollution.
-
Unlock new regions through progression, not randomizer jumps, at least on your first run. The biome order is designed to ramp difficulty gradually.
-
Switch to randomizer runs once you've cleared at least two biomes, because by then you'll know which tools match which pollution types and the randomizer's shuffled layouts will feel like puzzles rather than confusion.
That progression also pairs well with the Island Restoration speed upgrade guide, because cleaning efficiency upgrades compound with map familiarity. The more maps you've cleared in story mode, the faster your randomizer runs become, which means you can stack more side contracts per session.
Making Randomizer Runs Count
Randomizer runs feel chaotic at first because the shuffle layer rewires island restoration biomes, pollution spawn tables, and contract objectives every cycle, so a route that worked on the Coastal Reef map last session can fail on the Volcanic Shore rotation. A few habits make them much smoother: build your tool loadout around likely biome swaps, memorize which of the 12 maps tend to roll together, and treat each randomizer seed as a puzzle to plan around rather than a purely chaotic throwback.
-
Skim the pollution spawn points before starting the timer, so you know which tools to prioritize.
-
Save animal rescues for mid-run, because some animals only appear after you've cleared enough pollution to trigger a spawn event.
-
Use side contracts as randomizer mini-goals rather than treating them as separate content, because the contracts are designed to feed directly into the randomizer's shuffled objectives.
The combination of four biomes, twelve maps, a built-in randomizer, and infinite side contracts is what gives Island Restoration its long-tail appeal. Most cozy cleaning sims run out of content once you've cleaned every surface, but the randomizer keeps the environments feeling alive long after the story credits roll.
Why the Biome Variety Keeps the Game Fresh
The four Island Restoration biomes and their twelve maps form a tightly designed variety system, where each region pushes a different pollution profile, a different tool priority, and a different animal roster. The built-in randomizer ties that variety together by reshuffling spawn points, pollution layouts, and side contract objectives every time you sail into a new session, which is why the game keeps feeling fresh even after dozens of runs. Whether you stick to the story progression or jump into randomizer mode, the biome variety is the feature that makes Island Restoration more than just another cleaning sim, and it's the reason the $9.99 price tag punches well above its weight.
Frequently Asked Questions
How many biomes are in Island Restoration?
The full release of Island Restoration ships with four biomes — Tropical Isles, Mangrove Coast, Volcanic Reach, and Polar Expanse — split across twelve distinct maps. Each biome gets three maps, and the randomizer pulls from all twelve to keep every session feeling fresh, with biome-specific pollution profiles dictating which of the six cleaning tools you'll lean on most heavily.
What is the Island Restoration randomizer?
The randomizer is a built-in feature that reshuffles pollution spawn points, animal locations, side contract objectives, and lighting on every new run. It pulls from the existing twelve maps rather than generating new ones, which keeps the environments consistent while making the puzzles feel new.
Which biome should I start with in Island Restoration?
Tropical Isles is the first biome and the one featured in the free demo. It has the gentlest pollution profile and the most forgiving terrain, which makes it the ideal training ground for learning the six cleaning tools before tackling the denser regions.
Do all twelve maps unlock at once?
No. Maps unlock through progression as you restore islands and earn upgrades. The biome order is fixed (Tropical Isles → Mangrove Coast → Volcanic Reach → Polar Expanse), but the specific map you sail to within each biome can vary depending on your progression path and side contract choices. For example, accepting a mangrove-specific contract early can pull you into the Coral Flats map rather than the default Saltwater Hollow, shifting which cleaning tools you'll prioritize.
Can I replay the same map with different layouts?
Yes, and that's the randomizer's main job. Once you've unlocked a biome, you can revisit any of its three maps in randomizer mode, and the randomizer will rearrange pollution, animals, and objectives so the map feels different from your first visit.